Hello Sugar Lovers!
So I know I’ve been MIA for quite awhile now and you have my full apology. You know when life just gets the best of you? Sometimes you just need some time to fix whats going on in your life and figure out what you want. So I want to get back to writing for you guys. I will definitely have to figure out a new schedule for myself for uploading so it may take me awhile to get it right but be sure that I didn’t forget about you all. Promise.
Also a milestone has passed that I am sad that I missed. I have now been blogging for over a year! can you believe it! I am so happy that you guys like my blogs and are willing to come hangout with me for awhile out of your day to read about my antics. It means a lot to me and you guys are the best!
Without further or do lets get to the baking! So what better to get back to blogging than a simple classic apple pie recipe. At least it would be simple for other people but not me of course. I messed this up to. At least I’m consistent people…
This apple pie recipe I got from Bless This Mess by Melissa. It is a great recipe and super simple. I will link the website at the end of the blog!
You will Need:
- 3 tablespoons sugar
- 3 tablespoons all-purpose flour
- 1–2 teaspoons cinnamon
- Dash of salt
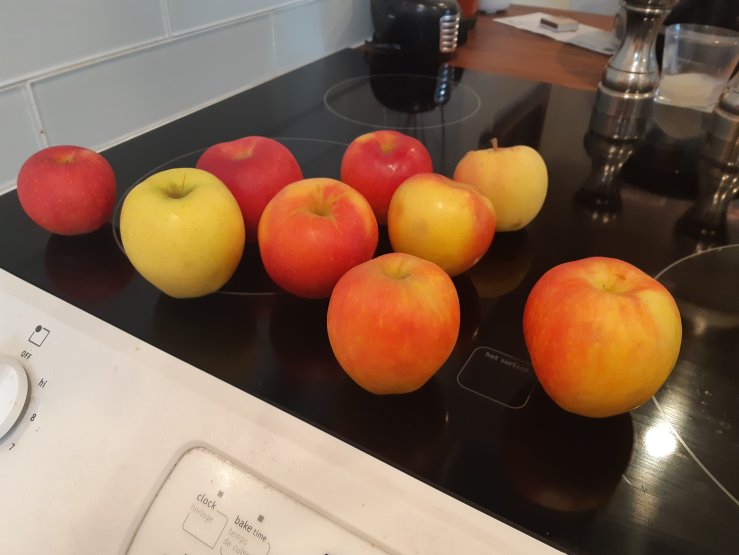
- About 5 cups thinly sliced apples (peeled and cored), 8-10 medium apples
- 2 tablespoons butter, cut into small piece
- Double Pie Crust
- 1 egg white + 1 tablespoon water
- granulated sugar
*Everything else you should be able to find in you kitchen*
So your going to start off with pre-heating your oven to 450 degrees. Now its time to peel the apples. The most boring part of making apple pie in my opinion. So I decided in all of my wisdom to make a game out of it. It was called the “let’s try and get this done in one peel” game. I successfully did that with one apple. The rest not so much. once you have them peeled you need to cut into slices. Make sure to cut out the bits of the core.
Once your ready mix together your sugar, flour, cinnamon, salt and apples.
Now for the pie crust I actually used extra dough that I had frozen from a previous blog and it kept pretty well so that was exciting. If you want to see the recipe I used for that you can check out my pumpkin pie blog (Pumpkin 3.14159…)

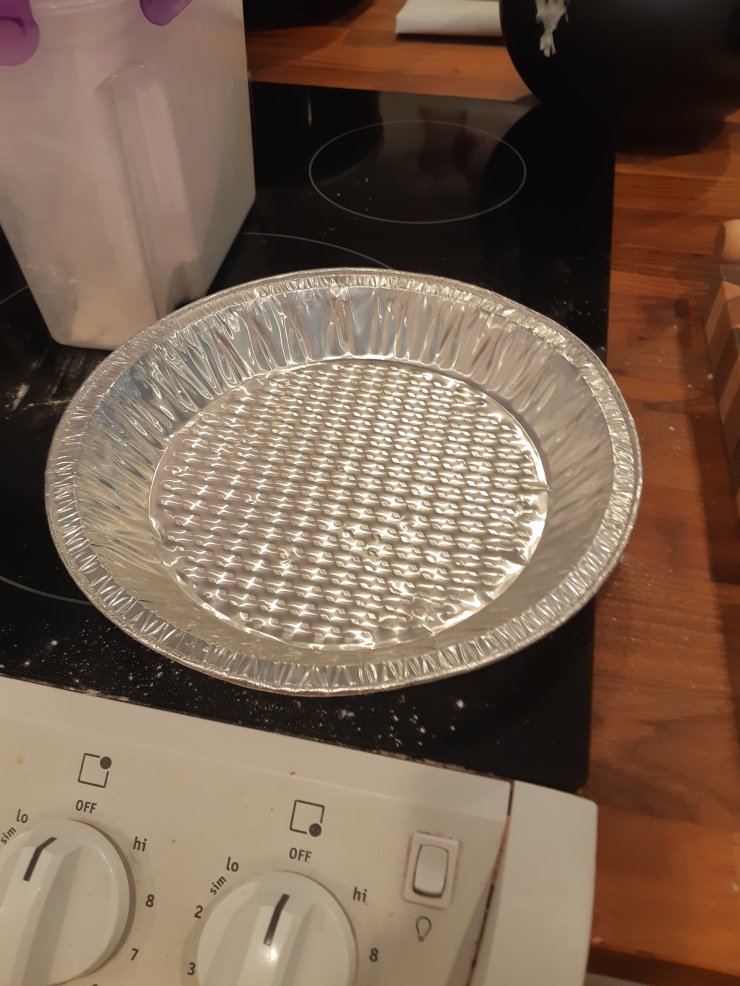
Once you have your dough all ready to go you can place it into the pie plate. I have been using disposable ones for now just because I bought more of them than I initially anticipated. Place the dough evenly into the bottom of the pan with a little over hang.


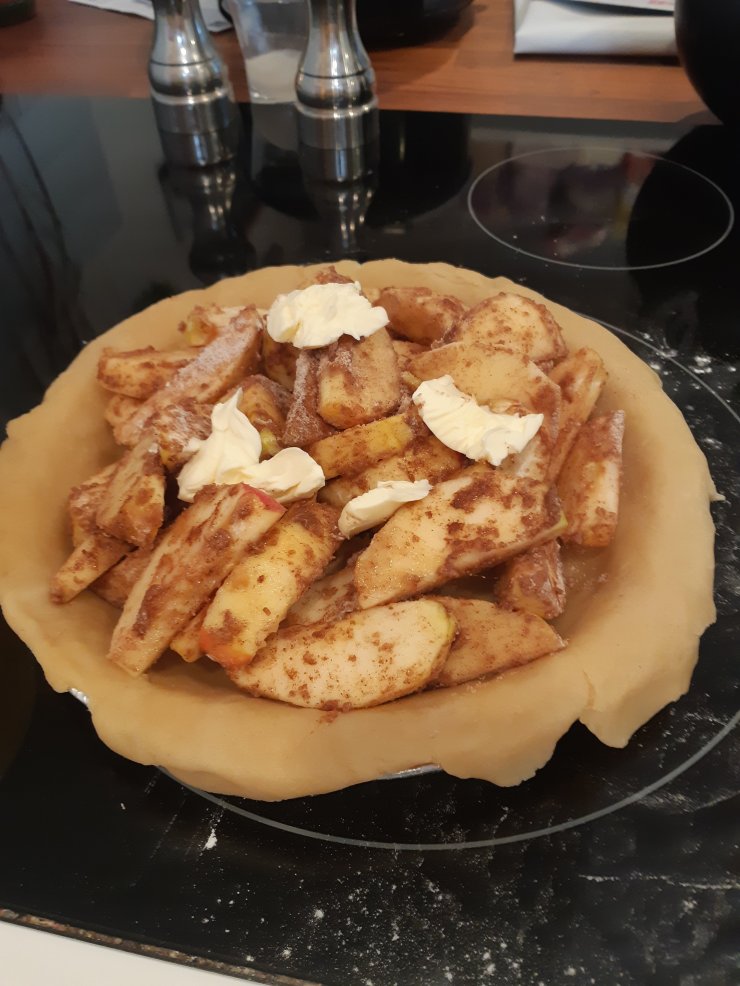
Also don’t forget this lovely shot of the pile of flour I dumped on the dough

…best baker ever award shoo in right here.
Once that is all rolled out into the pan you can pour in your apple mixture. Your going to want to make a small pile in the shell. You don’t want it piled to high or it could get pretty messy. Then your going to need to put your butter on top of the apple mixture.
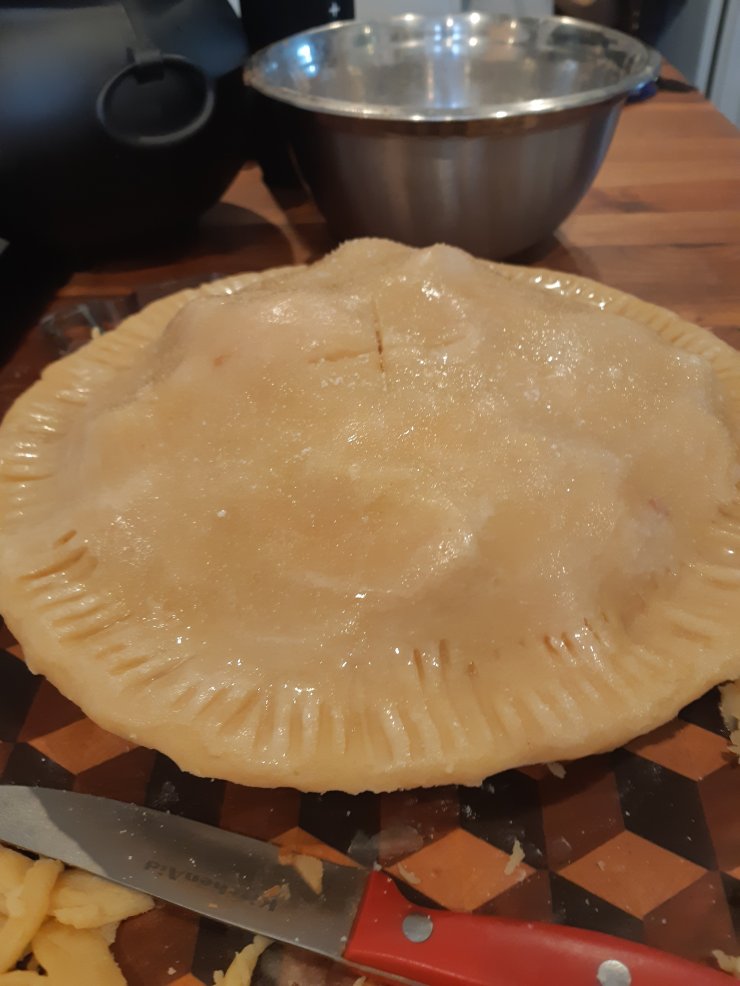
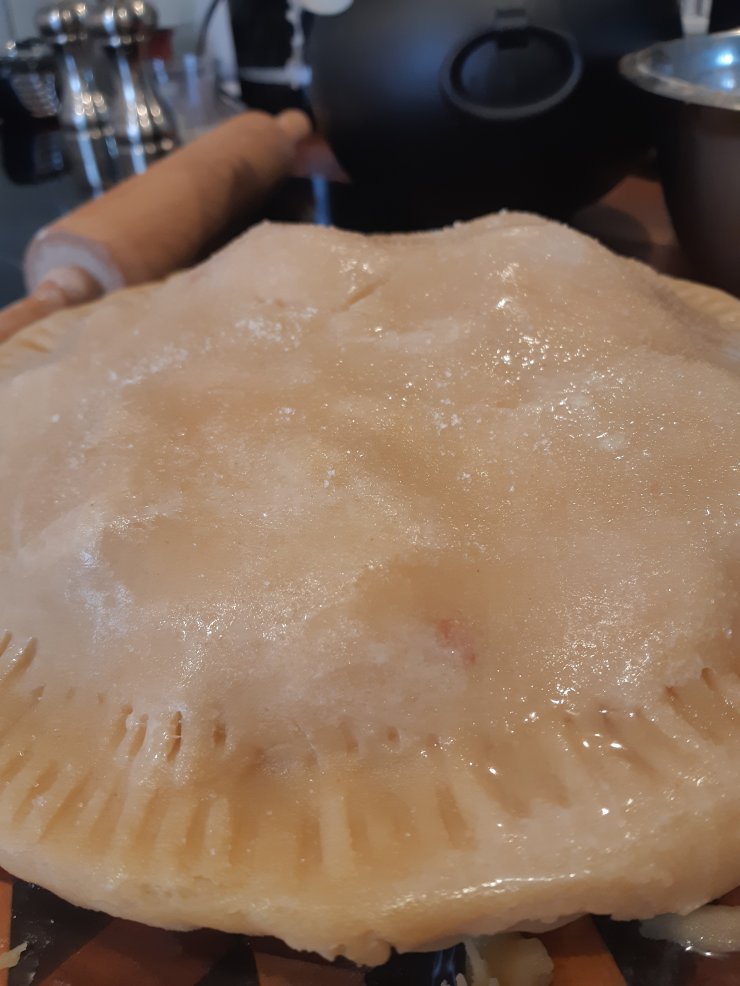
When your all finished with that you can roll out your other piece of dough and place that on top. There are all kinds of ways to ridge the edges. What I did first was cut the excess off. Then I took a fork and put impressions all the way around the pie’s edge. I then cut to slices into the top of the pie. I did this simply because it looked neat. I think it is actually to help heat escape….maybe….

Your also going to need to create your clear mixture for the top of the pie. Mix together your water and egg white. Once that it mixed your going to paint it on the top of the pie. If I’m being 100 % real I totally could not find the brush in the drawers and decided to cut my losses and decided to just use my hands….I’m tellin’ ya I’m like the MacGyver of baking. When your done with that all you do is sprinkle you sugar on top of the pie. You can use as much or as little as you like.
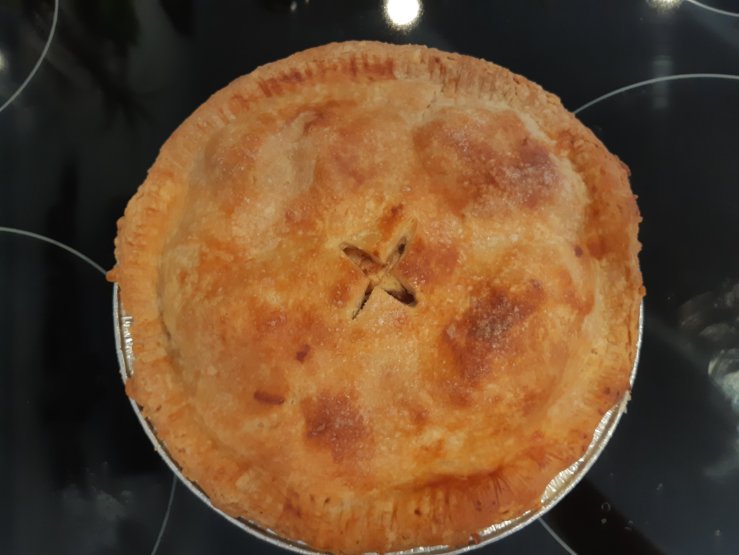
Next place your pie in the oven at 450 for 15 minutes. Your then going to reduce the heat to 350 degrees for 30 to 40 minutes. I had mine in for about 40 minutes.
Your done! That’s it that’s all! Now I had a bit of an issue with my crust being to thick on the bottom so I have to work on that for sure. Also mine turned out a little bit dry but I think that had a lot to do with the fact that the crust was a bit to thick. But hey, not to bad for my first blog back in a million years!
Thanks so much for hanging out with me today and make sure to go and show some love to Bless This Mess for the excellent recipe https://www.blessthismessplease.com/basic-apple-pie-recipe/
Make sure to like and subscribe so I know you guys like the blogs! As always you can check out my Facebook Page https://www.facebook.com/ashleyJ306/ where I post lots of updates. You can also choose to support The Baking Project through my Patreon Account https://www.patreon.com/user?u=13105790.
Happy Baking Everyone!
Your Friendly Neighbourhood Baker

https://rajrakt.wordpress.com/2019/09/27/why-bother-with-integrity/
I don’t know why but I felt the need to be validated by you. I had a dry spell for almost an year where I didn’t write a single blog.
Please give this a read. It’s a 5 minute post at max. And if you like, please comment and share.
My humble request. 🙏😊
LikeLike
Thanks so much for reaching out. It is very well written. I’m glad your getting back to what you like doing!
LikeLike
Thank you so much!
LikeLike